RHF Regency Men's Waistcoat: Tutorial, Part 2
Here is the second part of the Rocking Horse Farm Regency Men's Waistcoat Tutorial.
Remember, all seam allowance is 5/8" unless otherwise noted. Also, please remember that I'm sewing most of this with the machine, using modern seam techniques. There are other, more period correct ways of putting seams together. I would do it that way if I had more time (and will, for the real thing), but for the purposes of this tutorial...I'm going the easy route. You can finish off your seams however you like. I don't mind....honestly.
(PS - I appologize on behalf of Blogger for horrible spacing issues...I'm stumped. Anyway, the comments go with the pictures ABOVE them, not below them...but you're smart enough to figure that out!)
Step Six: Constructing the Waistcoat, outer fabric
The first thing you need to do to the outer fabric of your waistcoat is put in your darts. (Do not work on your Lining yet...we will get to that later.) Fold your Front pieces along the center of the dart. Remember that the dart will be on the inside of the waistcoat, so make sure you fold it with right side together. Pin the darts to hold them in place.
Stitch the darts on both Front Pieces.
Open up both Front pieces, and press the darts outward toward the arm scythe.
Next, place the Back pieces right sides together, matching up the center seam. Pin together.
Stitch down the center Back seam.
Open up the Back and press seam open.
Match up both shoulder seams of Front and Back, and pin in place. Remember that you want Right sides facing each other, and arm scythes should be facing outward to the right and left.
It should look like this once the shoulders are pinned in place.
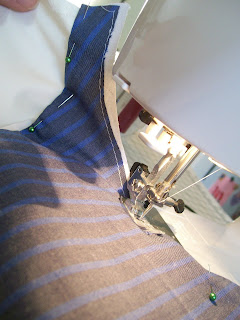
Stitch the shoulders together.
Trim your seam allowance if you are messy like I am.
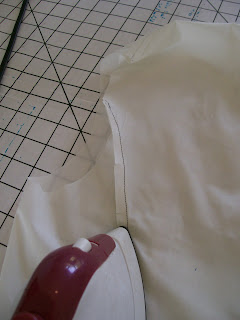
Open up the shoulder seams and press.
It should now look like some sort of large, cloth ninja star. (Flash back to when my brother was into Teenage Mutant Ninja Turtles!)
Again, just like when we did the mock-up. Pinning the side seams is one of the slight tricky parts to this project. Just make sure that you match up the seam with right sides of your fabric together. Start pinning at the bottom of the waistcoat and pin all the way up to the arm scythe, easing around the curve as you go.
Once it is pinned, the back should look like this.
Stitch up your side seams.
Trim and clip along the curve of the side seam.
Press both side seams outward toward the arm scythe.
One thing I noticed when making my mock-up was that due to my alterations, the shape of the shoulder area was a little wonky, and stuck out about a 1/4".
Because this didn't affect my husbands shoulders in any way, I trimmed the part that was sticking out. Just remember, that if you do this for the outer part of the waistcoat, you will have to do it for the Lining as well.
And just because I like to double check my work before I get too involved (lesson learned the hard way), I put it on my husband and pinned the front closed.
The back looks great now...snug as a bug.
The Front fits pretty well to, if I do say so myself. I still don't like the high darts...but c'est la vie. On the real one, I will forgo the darts, and put in front-side seams. Ready to move on?
Step Seven: Constructing the Lining
The Front Lining starts off the same as the Front. Fold and pin down the center of each dart. Then stitch in place.
Open up the Front Lining pieces and iron the darts toward the side seam.
Place the Back Lining pieces right side together, and pin along center seam. Stitch down center seam.
Open up Back Lining and iron open the seam.
Here's where it diverges from the outer part of the waistcoat....and gets a little more tricksy (gollum!). Find your 2 canvas Front Interfacing.
Place the WRONG side of the Front Facing to the RIGHT side of the Front Interfacing.
Now, Lay these two pieces on top of the RIGHT side of your waistcoat Front Lining. It's like a sandwich... Front Lining, Front Interfacing, then Front Facing. Just make sure that the Front Facing and Front Lining are looking at you with their right sides. You will see these later, so do a good job! Pin all three layers together. Repeat with other side of the waistcoat Lining.
Let's talk about the inner edge of your Front Facing, where it meets up with the Front lining. The directions don't address this at all. You could serge along this edge to keep it from fraying, and then just stitch it into place, or you could do what I did....
Fold it under about a 1/2 " or less.
So that it looks nice and straight and polished off, and pin it into place. We will stitch it later.
Baste through all three layers, around all of the Front Facing edges except the one we folded under.
The Front Facing and Front Lining will look something like this now.
Now whip-stitch the Front Facing down to the Lining along the inner edge. Yes, it's hand stitching, but it doesn't take long, it looks great, and it's bragging rights.
Next, place the Front Facing/Front Lining pieces right sides together with the Back Lining. Match the shoulder seams and pin.
Stitch both shoulder seams of the Lining.
Open up shoulder seam and press. Do this for both shoulders of the Lining.
Do the same thing with the Lining side seams that you did with the outer waistcoat fabric. Place the Front Lining right side together with the Back Lining. Pin along the side seam starting at the bottom and easing your way along the curve up to the arm scythe. Stitch side back seam. Do this on both sides.
Clip along curve of the side back seam. Press side back seams toward outer arm scythes.
Don't forget to trim the overhang of the shoulder IF you did this for the outer fabric.
Now, turn your Lining right side out, and voila! The lining is done.
Step 8: Constructing the Collar
Now, on to the Collar. This is the easy part. Lay out your 4 Collar pieces of fashion fabric, and your 2 Collar Interfacing pieces of canvas.
Center seams for the collar are only 1/4". Place each Collar fashion fabric set right sides together, and pin down center seam. Overlap Collar Interfacing 1/4" and pin together.
*On a slightly side note: If you took in your Back Center Seam when you made the mock-up waistcoat, this is the point where you will need to adject your collar seam too, and take it in as much as is neccessary.*
Here's a closer look, just because.
Stitch together the two pieces of Collar Interfacing, sewing straight down the center of the overlapped seam.
Stitch down the center seam of BOTH Collar pieces.
Open up both Collar pieces and press open the seams.
Your three Collar pieces are ready to put together now.
We are creating another sandwich. But first, lay the Collar Interfacing on top of the first piece of Collar fashion fabric. Make sure to place it on top of the WRONG side of this first piece. Take a closer look at the picture...you can see the center seam there.
Pin this together.
Baste along all edges, sewing together the Collar interfacing and ONE piece of Collar fashion fabric.
Next place the SECOND Collar fashion fabric piece RIGHT sides together with the one you just basted. The Collar Interfacing should be on the bottom of this sandwich.
Pin along the sides and top of the Collar only.
Use a 5/8" seam allowance for this part. Start stitching at the bottom of one side...
Stitch up to the corner...put your needle down...pivot the fabric...
Stitch across the top.
Keep going...
Stop at the other top corner...put your needle down...pivot fabric....
And continue down other side...stopping at the bottom edge.
Do not stitch across the bottom. Your Collar should look like this now.
Trim top and side edges.
Clip corners carefully.
Notch along top (slight) curve if you feel it is necessary.
Turn Collar right side out, straightening out corners.
Iron Collar well.
Your Collar is set to go!
This concludes Part 2 of the Tutorial. I will try to have the final construction part up by this Sunday night, May 8th.


Comments
I personally think the blue striped cotton looks exceedingly nice as a waistcoat. Very pretty and crisp!